1/6 Harley Davidson FLH Classic Recap
This is just a short recap taken from the blog pages of my build of the Harley.
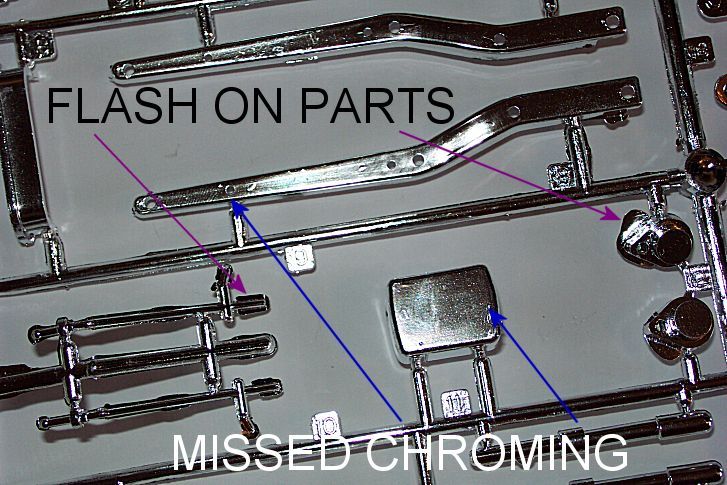
After my initial pleasure, I noticed that all was not well.
with closer look at the sprues I could see some very serious
problems to come as some of the chrome effect had not worked on
one of the sprues so faded in a lot of places to its natural
black plastic colour, some of the other chrome parts were
scratched & a lot of remaining parts had either a lot of "flash"
or obvious mould lines.
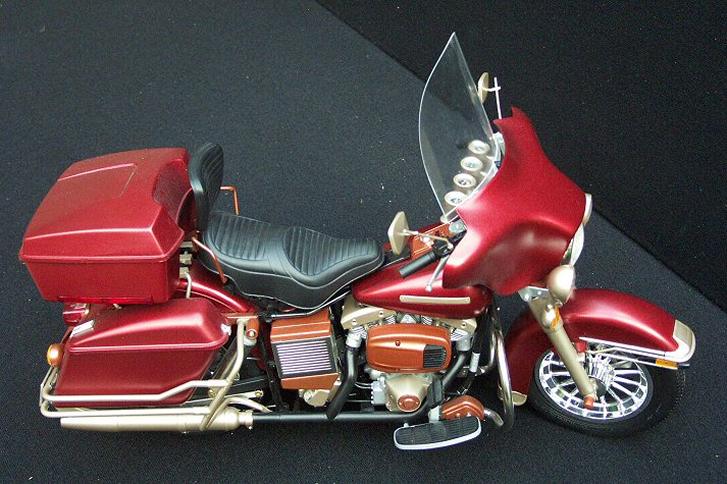
Thanks to my wife’s idea went with a bright and mad "Custom" paint job on the bike, which now I look at the kit years on can be vastly improved.
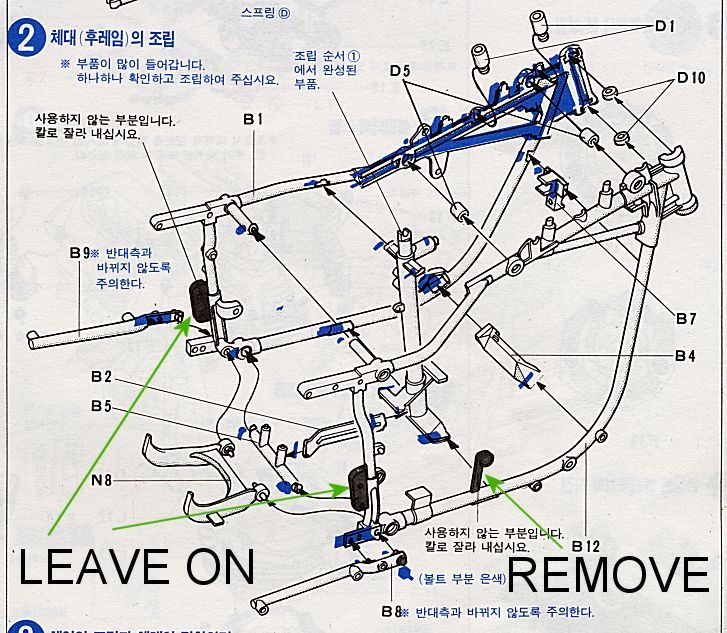
On the frame of the Harley there is an area marked to be removed to allow the rear foot rests later on.
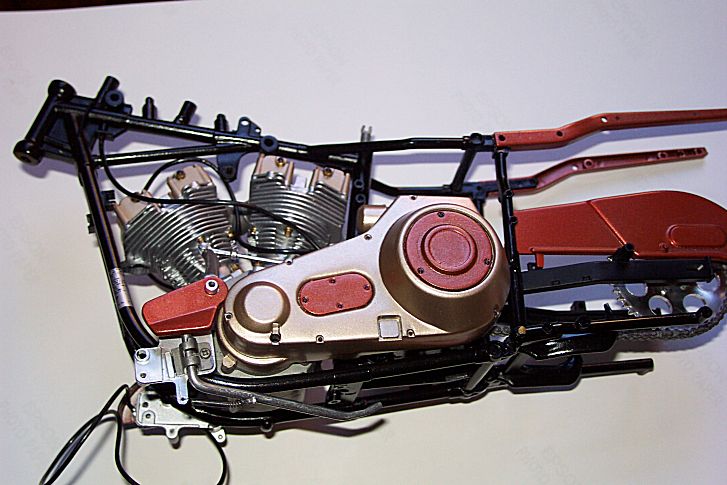
The chain was painted in Tamiya Metallic Grey & given a black ink wash to bring out the link detail. I then sprayed the frame in gloss black & the completed suspension arm in satin black.
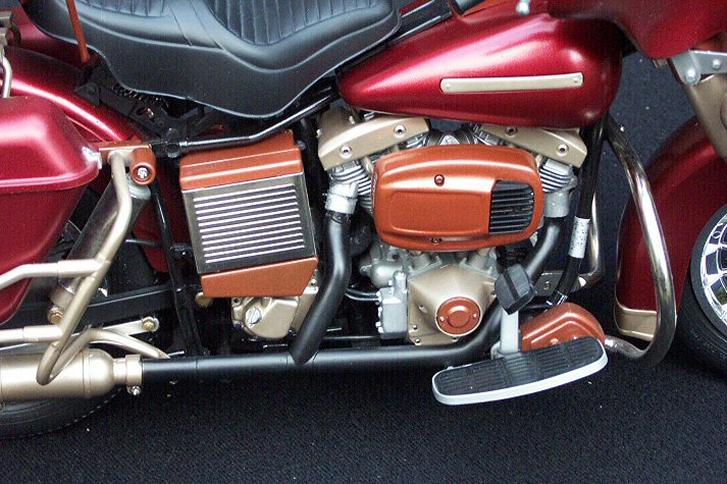
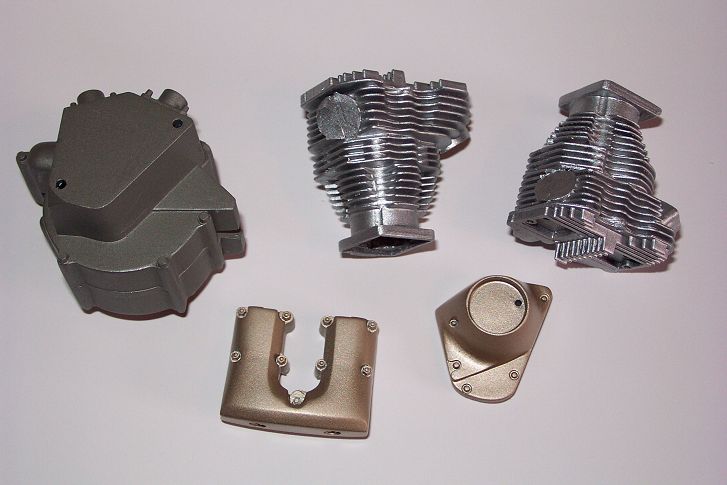
The engine covers were going to be re-painted, built these up & put them aside. The crank case was done in Tamiya Metallic Grey, the cylinder head in Tamiya Chrome Silver & the rocker covers & case cover in Sovereign Gold.
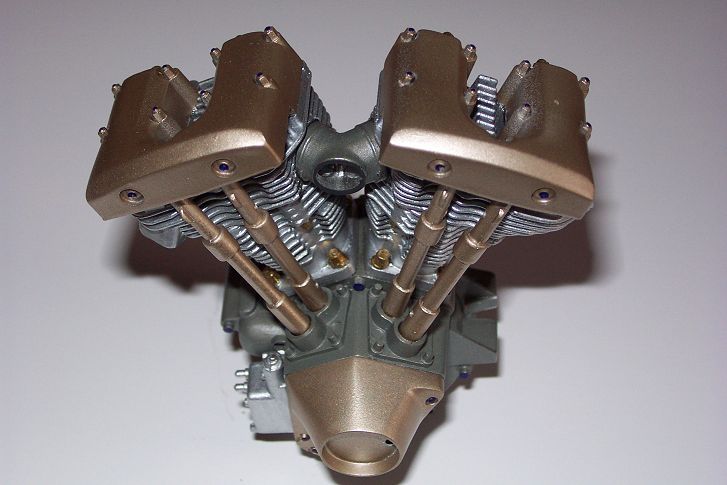
The push rods were also sprayed in the gold & the engine assembled. All the bolt details were painted in to help follow the theme & some of the other bolt heads were highlighted in purple.
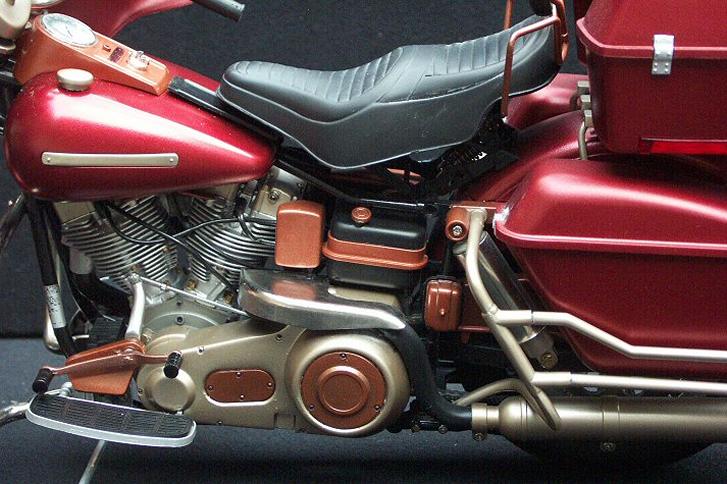
I removed the Chrome from the drive train covers, primed and painted them in gold, then the gearbox unit was painted in Metallic Grey & the piping fixed with a small amount of superglue.
The decals were fixed on the frame & the engine mounted in place as well as the gearbox unit.
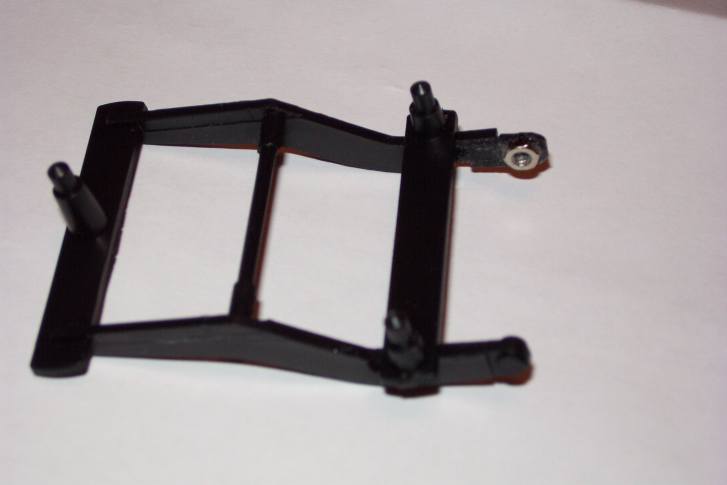
The sub assembly section in part 10 where the stand spring is fitted has a problem where no fixing hole has been drilled, so used a 0.3mm drill so that the spring hook would fit in the stand arm. It is advisable to allow the glue from fitting part D30 to set before you fit the spring to the stand.
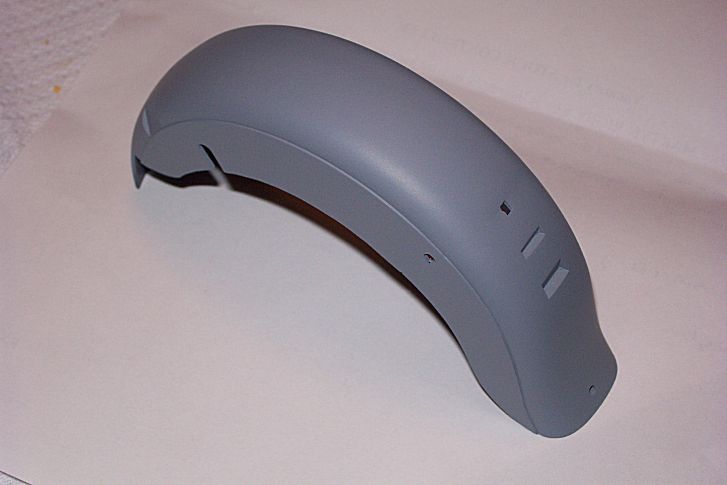
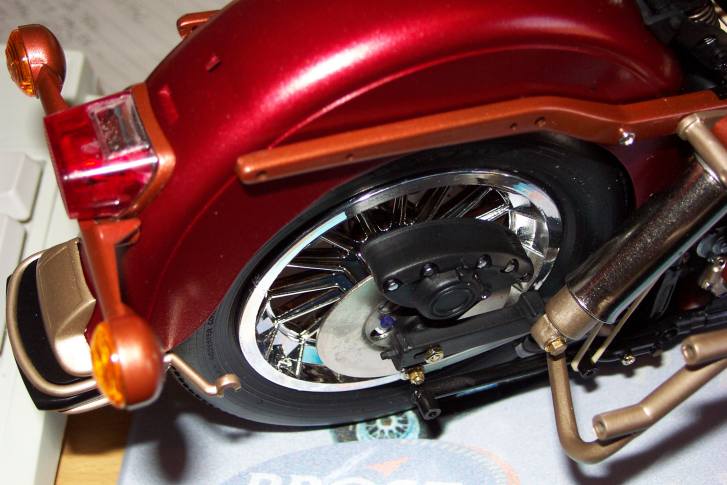
The rear mudguard comes in four parts, so some filler was required at the joins, sanded down smooth, primed & sprayed in Canyon Red.
I found that a small amount of superglue on the metal rear shocker covers helped as in this kit as they kept coming loose. Take care not to overtighten the screws holding the rear shockers & support bars for the paniers as if you try to tighten them too much the bars will try to push out from under the shockers.
What fun, NOT!!!! Part T6 of the seat suspension had a major fault with being moulded incorrectly as was totally useless. To get round this isue I glued a 3mm nut to a piece of plastic & reshaped it to match the faulty piece.
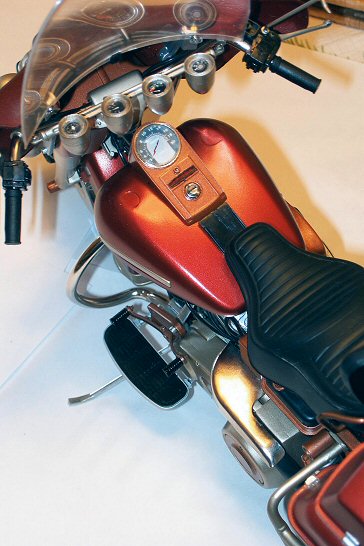
The fuel tanks needed a lot of filler at the joints to produce a seamless finish, which allowed for a better primer and gloss red top coats.
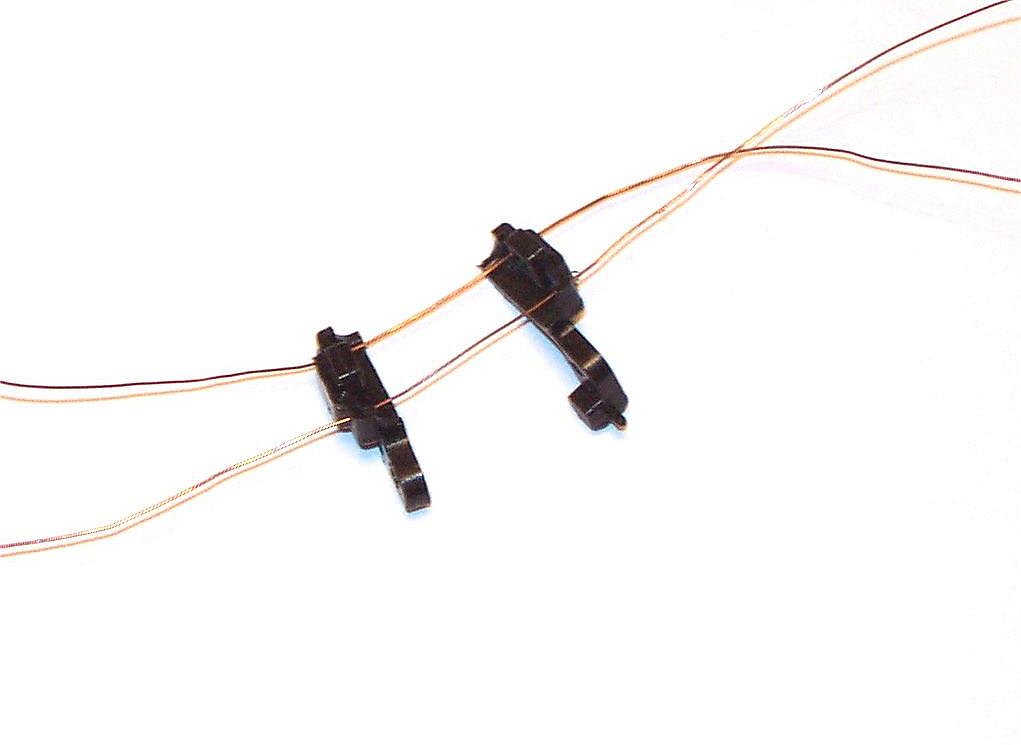
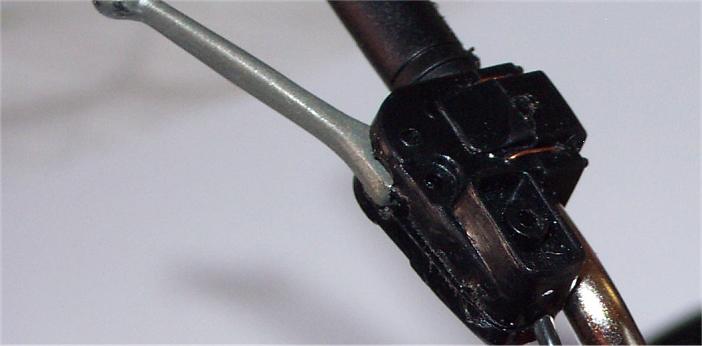
One very large gripe here. Whoever’s idea it to make the controls out of rubbery plastic needs serious talking to as I have no glue that will hold them together, and I have lots of different ones on my workbench!! I had to devise a way to keep them connected so I came up with a "wire" system by making two 0.5mm holes in the parts that hold the levers and fed a thin wire between them. I also drilled 4 holes in the small part which connects to them to receive the wires. I fed the wires through the pieces and when all of it was mounted on the handlebars twisted the wires till they were tight and cut the ends off.
OH NO!! that dreaded rubbery plastic again & no glue I had will stick it so I followed same thing for the tank cover by drilling holes in one of the tanks, fed wire through & fastened underneath.
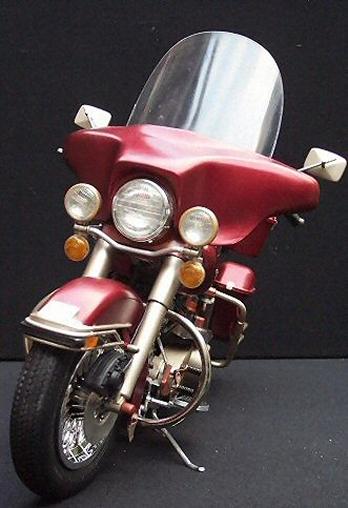
The windshield screws into the fairing supports as shown in the diagram, but do give it a clean beforehand as it looks better for it. The fairing should then push into the support, but mine looked out of position as there was a gap between the top of the headlight & the bottom of the fairing, so I cut the lugs off the fairing & glued the base to the headlight.
As you can see this, to me, looks better & is how it should look on a real bike. Well that's it for the recap and time to work on another model.
Thanks to my wife’s idea went with a bright and mad "Custom" paint job on the bike, which now I look at the kit years on can be vastly improved.

On the frame of the Harley there is an area marked to be removed to allow the rear foot rests later on.
The chain was painted in Tamiya Metallic Grey & given a black ink wash to bring out the link detail. I then sprayed the frame in gloss black & the completed suspension arm in satin black.

The engine covers were going to be re-painted, built these up & put them aside. The crank case was done in Tamiya Metallic Grey, the cylinder head in Tamiya Chrome Silver & the rocker covers & case cover in Sovereign Gold.
The push rods were also sprayed in the gold & the engine assembled. All the bolt details were painted in to help follow the theme & some of the other bolt heads were highlighted in purple.
I removed the Chrome from the drive train covers, primed and painted them in gold, then the gearbox unit was painted in Metallic Grey & the piping fixed with a small amount of superglue.
The decals were fixed on the frame & the engine mounted in place as well as the gearbox unit.
The sub assembly section in part 10 where the stand spring is fitted has a problem where no fixing hole has been drilled, so used a 0.3mm drill so that the spring hook would fit in the stand arm. It is advisable to allow the glue from fitting part D30 to set before you fit the spring to the stand.
The rear mudguard comes in four parts, so some filler was required at the joins, sanded down smooth, primed & sprayed in Canyon Red.
I found that a small amount of superglue on the metal rear shocker covers helped as in this kit as they kept coming loose. Take care not to overtighten the screws holding the rear shockers & support bars for the paniers as if you try to tighten them too much the bars will try to push out from under the shockers.
What fun, NOT!!!! Part T6 of the seat suspension had a major fault with being moulded incorrectly as was totally useless. To get round this isue I glued a 3mm nut to a piece of plastic & reshaped it to match the faulty piece.
The fuel tanks needed a lot of filler at the joints to produce a seamless finish, which allowed for a better primer and gloss red top coats.
One very large gripe here. Whoever’s idea it to make the controls out of rubbery plastic needs serious talking to as I have no glue that will hold them together, and I have lots of different ones on my workbench!! I had to devise a way to keep them connected so I came up with a "wire" system by making two 0.5mm holes in the parts that hold the levers and fed a thin wire between them. I also drilled 4 holes in the small part which connects to them to receive the wires. I fed the wires through the pieces and when all of it was mounted on the handlebars twisted the wires till they were tight and cut the ends off.
OH NO!! that dreaded rubbery plastic again & no glue I had will stick it so I followed same thing for the tank cover by drilling holes in one of the tanks, fed wire through & fastened underneath.
The windshield screws into the fairing supports as shown in the diagram, but do give it a clean beforehand as it looks better for it. The fairing should then push into the support, but mine looked out of position as there was a gap between the top of the headlight & the bottom of the fairing, so I cut the lugs off the fairing & glued the base to the headlight.
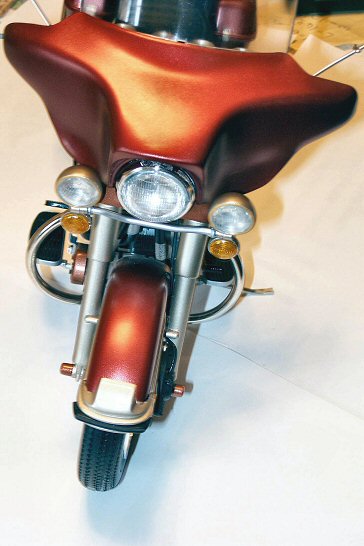
As you can see this, to me, looks better & is how it should look on a real bike. Well that's it for the recap and time to work on another model.